Saving Documents to Salesforce Records
Saving of a Page or Group of Pages to Salesforce Records
Docusplit Saving Options Explained
Docusplit has a robust saving process that ensures the highest rate of efficiency and includes standardization of file formats, file naming conventions, saving permissions, and the ability to view or update record fields within the Docusplit user interface.
Selecting the Page or Pages that will be Saved.
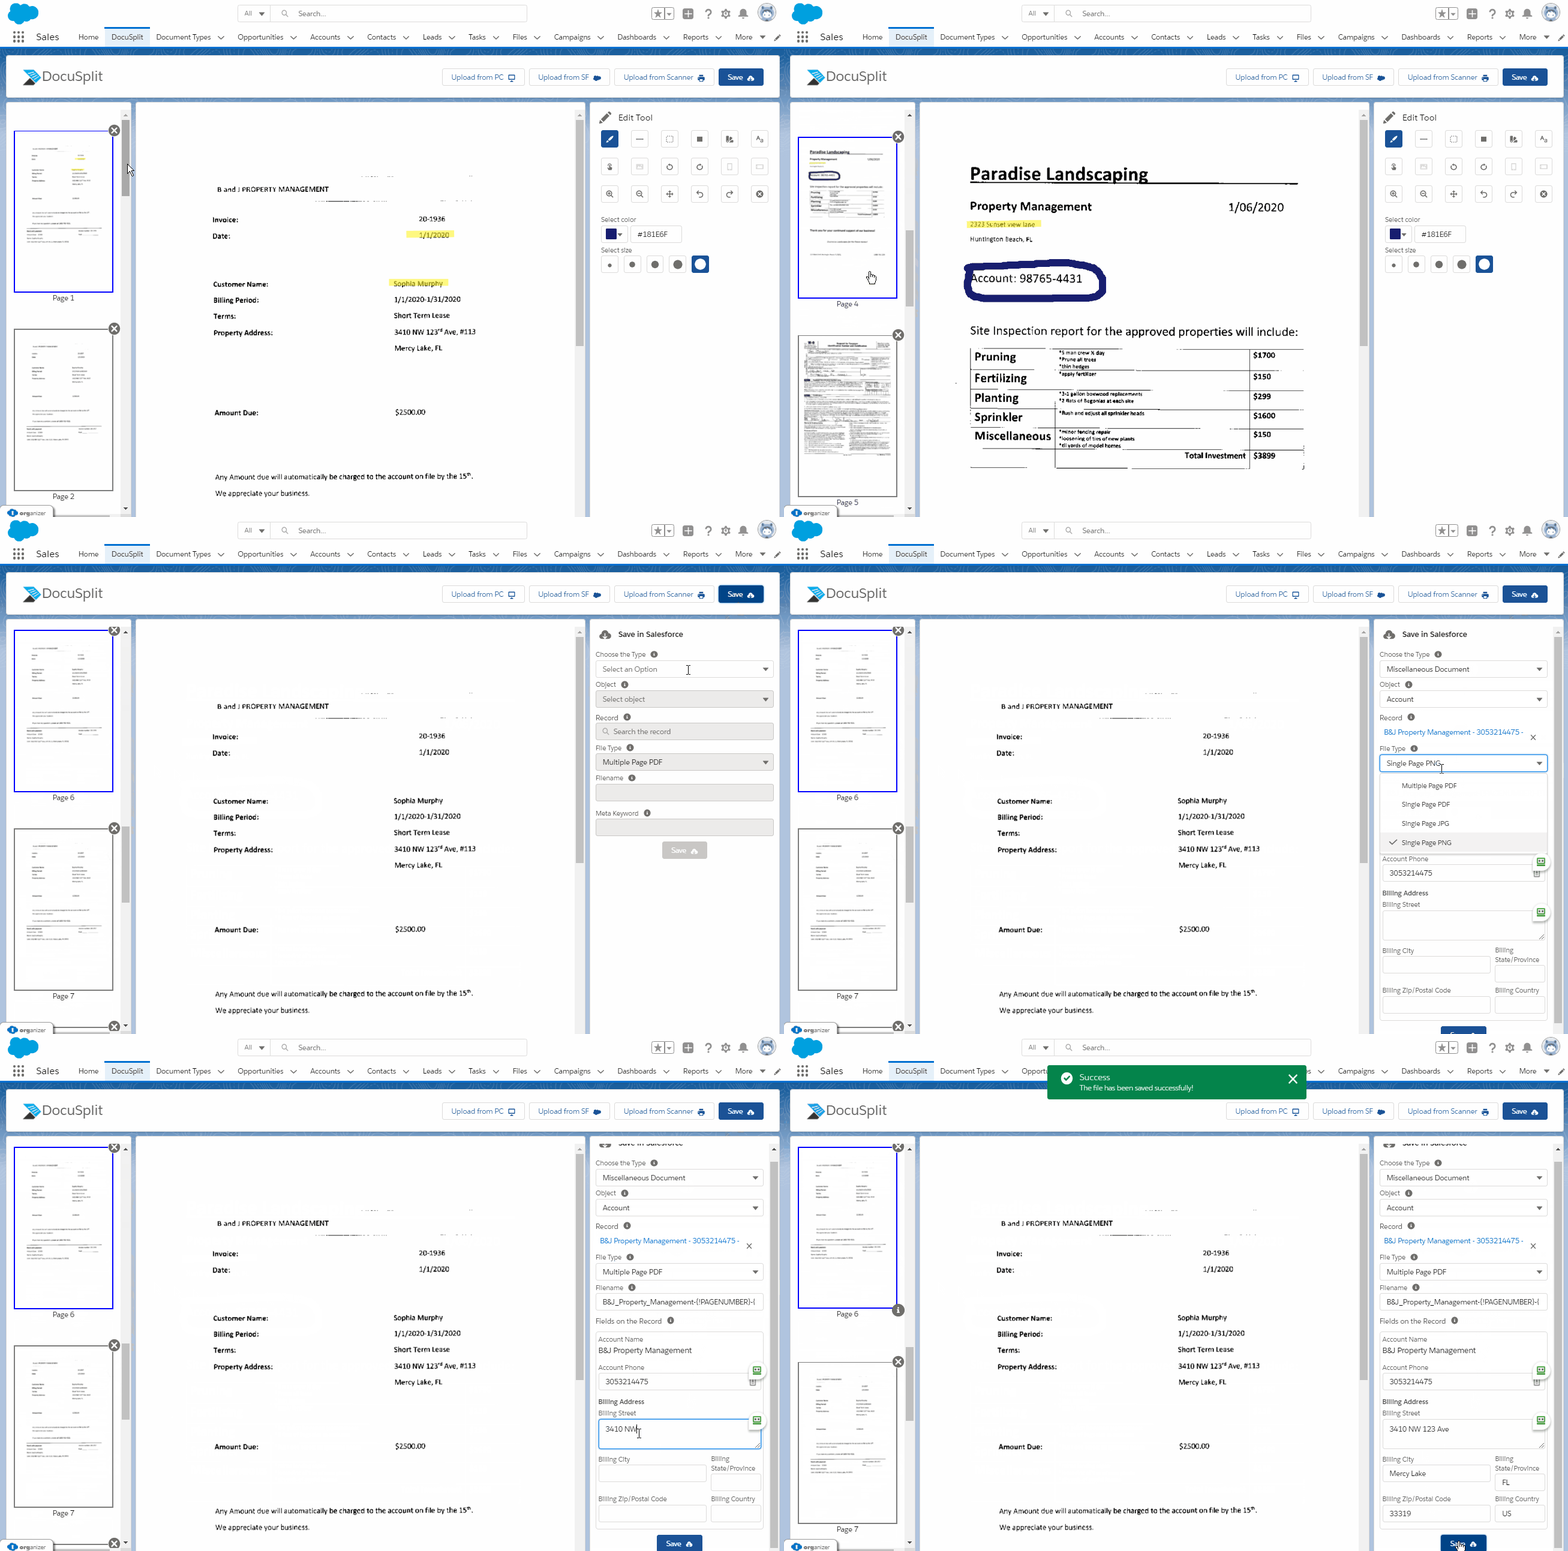
As in many Mac or Windows Apps, Docusplit allows for the selection of one or multiple pages. To select multiple pages, the user can select the first page, hold down the Control Key on the keyboard and select another page within the thumbnail grid. Furthermore, a user can select a sequence of pages by holding the Shift Key.
Saving the Page(s) Selected
Once the pages have been selected, the user must:
- Click the "Save" button.
- Choose the Document Type (Created by the Salesforce Administrator).
- Choose from the Object name of the Record you will be saving the file to.
- Search for the record you will be saving the file to (as you type records will begin to appear).
- Select the File Type, if different from the default set by the Salesforce Administrator.
- Edit the Filename, if the default name selected by the Salesforce Administrator is incorrect.
- If the Salesforce Administrator has enabled display fields to be editable, users will see a form at the bottom of the grid that will allow for updates to the record in which the files will be saved to.
- Click "Save"

Viewing Save History
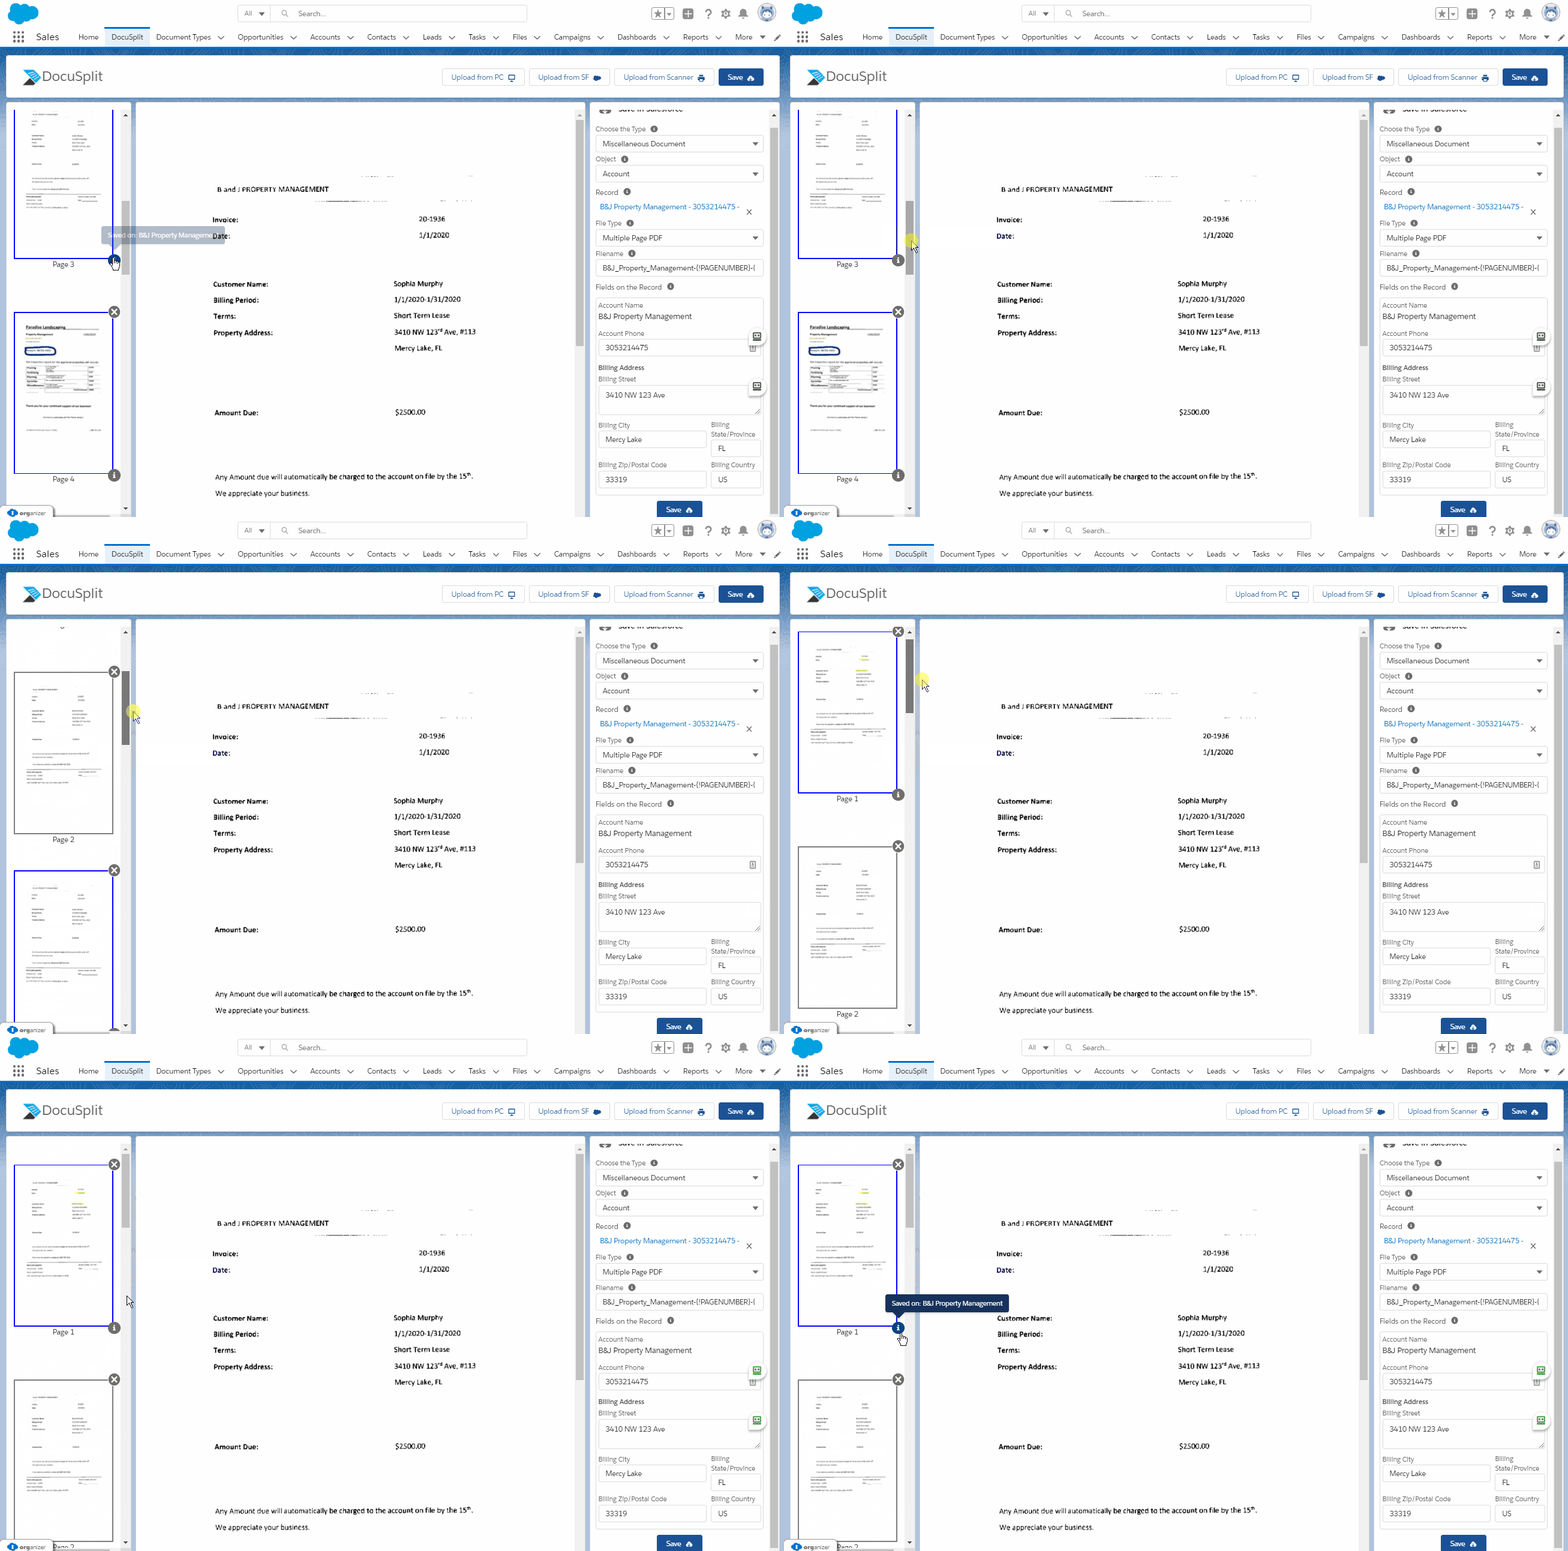
Once a page or group of pages have been saved, Docusplit displays an info icon ℹ️ on the bottom right-hand side of each of the saved thumbnail pages. When a user hovers over the icon, the name of the record to which the page was originally saved will appear. Similarly, if the page was saved to multiple records at different times, the additional record names will appear.

Updated 11 months ago