Check Scanner Drivers
Supported Scanners, Drivers, and the Installation Process
Compatible Scanners
To use the Payology Check Scanning SDK end-users must have compatible check scanners and a Windows based PC. A list of the most popular supported scanners can be found below.
Manufacturer | Model |
|---|---|
Digital Check | CX30 SmartSource Adaptive SmartSource Elite 55SE SmartSource Expert SmartSource Expert Elite SmartSource Micro Adaptive SmartSource Micro Adaptive SE SmartSource Micro Elite 55 SmartSource Micro Elite SmartSource Micro EliteSE SmartSource Pro Elite SmartSource Professional TS240 TS300 TS400
|
Panini | l:Deal ml:Deal VisionneXt VisionX
|
Epson |
|
Canon |
|
Arca (CTS) | LS150 LS150UV LS 40 |
RDM | EC9000i Series
|
Magtek | Excella |
Unisys/Burroughs |
|
** Premium Driver Licensed at Higher Rate.
Recommended Scanners
Organizations which receive remittance items whose size can be as long as 8 1/2 x 14 can utilize the Smartsource Adaptive scanner. The scanner supports full page document scanning but is, in fact a check scanner with the ability to extract MICR data in bitonal and grayscale. More details can be found here:
https://www.digitalcheck.com/full-page-check-scanner-adaptive/
Drivers and Services
In addition to driver installation, end-users using the Check Scanning SDK must also download and install Ranger Remote, a windows service that allows browsers to communicate with check scanning hardware. Both the check scanning drivers and Ranger Remote are, in many cases, the same drivers shipped by the manufacturers themselves. As such, drivers and services adhere to the highest security protocols.
Driver and Ranger Remote Downloads
The URLs for the two most popular drivers in addition to the Ranger Remote solution are listed below. For all other drivers, please contact your Account Manager or Sales representative.
| Driver/Solution | Download URL |
|---|---|
| Ranger Remote | https://www.check21.com/Ranger/ranger-remote.exe |
| Panini | https://www.check21.com/Ranger/Panini/PaniniVisionAPI.exe |
| Digital Check | https://check21.com/ranger/digitalcheck/digitalcheck.exe |
| RDM | https://check21.com/ranger/RDM/RDM_Scanners.exe |
| SmartSource Adaptive | https://check21.com/ranger/digitalcheck/Smartsource.exe |
| Epson TM-S1000 | https://check21.com/ranger/epson/EpsonCaptureOne.exe |
| Epson TM-S2000 and TM-S9000 | https://check21.com/ranger/epson/EpsonTMS.exe |
| Canon CR50 / CR80 / CRL1 | https://check21.com/ranger/Canon/Canon-CR50CR80CRL1.exe |
| Canon CR135i / CR190i / CR190i II | https://check21.com/ranger/Canon/CanonCR135i_CR190i.exe |
| Magtek | https://check21.com/ranger/MagTek/MagTekExcella.exe |
| LS 40 | https://check21.com/ranger/CTS/CTS_LS_40.exe |
| LS 150 | https://check21.com/ranger/CTS/CTS_LS_150.exe |
Installation of Drivers
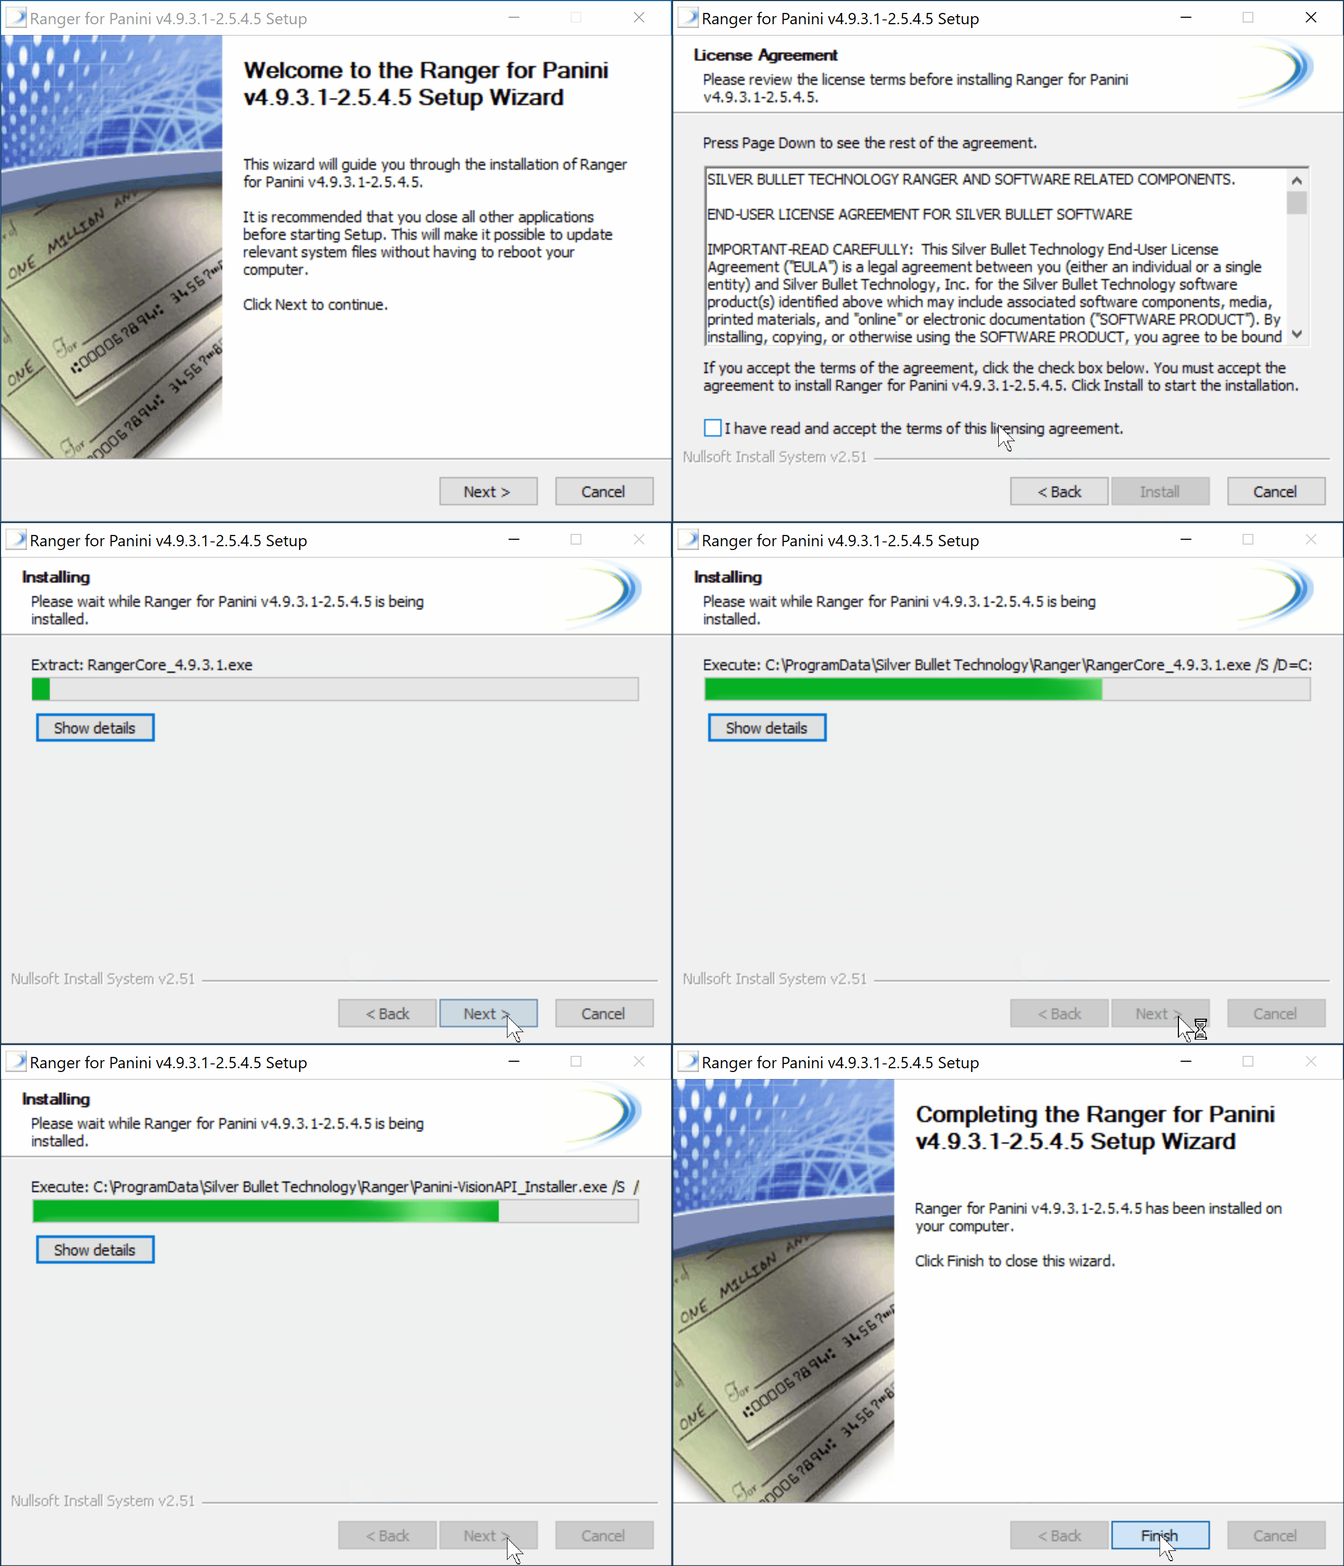
To install the Check Scanner Driver the end-user must follow the steps outlined below:
- Download the appropriate driver using the URL found on the grid above.
- Upon download completion and before running the installation file, please disconnect your scanner from the PC.
- Once disconnected, right-click on the driver file and click "Run as Administrator".
- Follow the on-screen instructions.

Installation of Ranger Remote
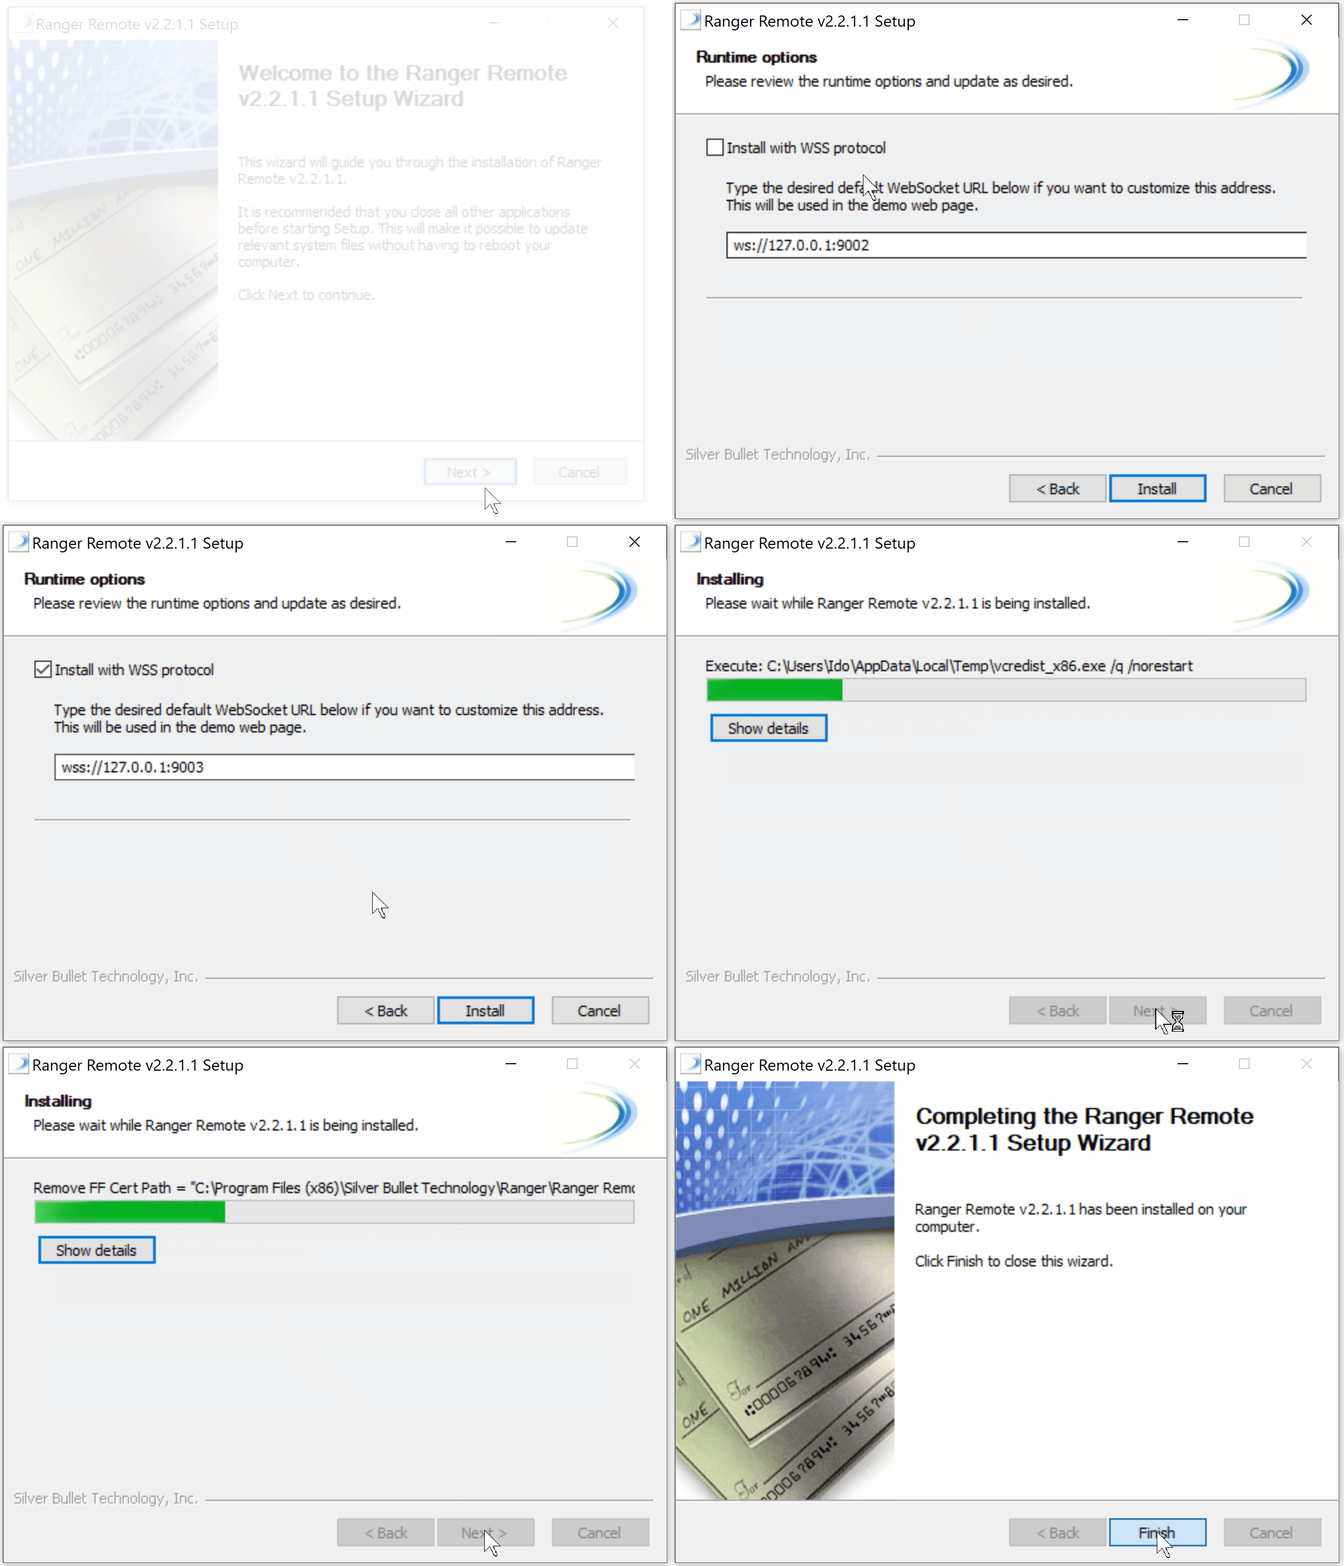
After installing the scanner driver, the end-user must then install the Ranger Remote Service. To do so, the end-user must follow the steps outlined below.
- Download the Ranger Remote Service using the URL found on the grid above.
- Upon download completion and before running the installation file, please disconnect your scanner from the PC if it is connected.
- Once disconnected, right-click on the Ranger Remote Installation file and click "Run as Administrator".
- Follow the on-screen instructions.
- Ensure during the installation process that you select the "Use WSS" option.

Registering and Unlocking the Driver License
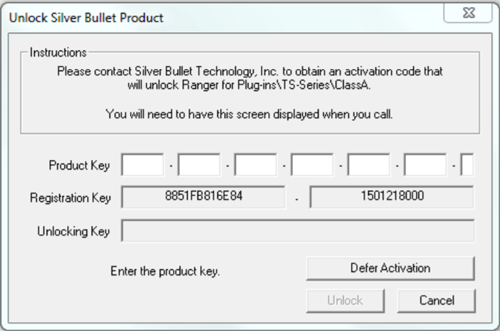
As a final step in the end-user installation process, the user must unlock the Ranger driver. Without unlocking the Ranger driver, Ranger Remote cannot be used as a communication method between the scanner and Browser. To unlock the Ranger driver, please follow these steps:
- Press + S on your keyboard.
- Search for "RangerFlex".
- Once found, right-click on "RangerFlex" and click "Run as Administrator".
- When prompted, enter the Product Key provided by the Check21.com Account Management or Sales teams.

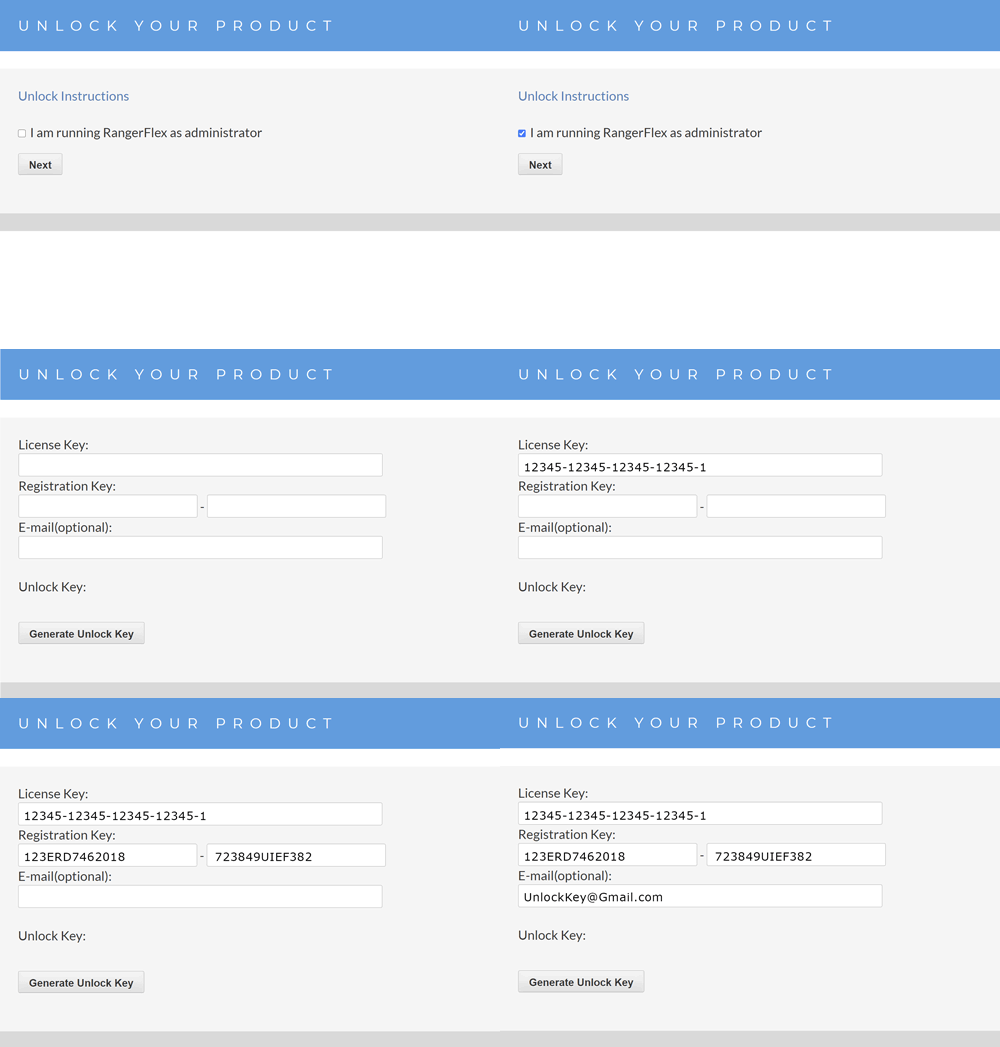
- While the RangerFlex windows is still active, click on your browser and vist the following URL: https://sbullet.com/technical-support/unlock/
- Click the checkbox marked "I am running RangerFlex as an Administrator" and click "Next".
- Enter the Product Key provided by the Check21.com Account Management or Sales teams in the License Key field.
- Enter the Registration Key provided within the active RangerFlex window in the Registration Key field.
- Enter your email address in the e-mail address field and click "Generate Unlock Key".
- Copy the Unlock Key from the browser window and Paste it within the current RangerFlex window.
- Click "Unlock".

OCR on Panini Vision X Scanners
Clients using a Panini scanner and require remittance scanning with OCR (OCRA or OCRB) must upgrade (software update) their device through Panini, the manufacturer itself. The below form can be used to purchase the upgrade.
Panini OCR UpgradeIn your email to Panini, inclusive of the document, please provide the serial number of the device.
Important Notes
Please note that if installing the check scanning drivers on a PC which is currently being utilized for scanning with other third party solutions (i.e. bank-based scanning), Check21.com cannot guarantee that such solution will continue to function.
Users experiencing feeding errors should consider disabling Double Feed Detection. The optional change is as follows:
Folder Location: C:\ProgramData\Silver Bullet Technology\Ranger\Scanner Plug-ins\
File Name: GenericOptions.ini
Default Field and Value: NeedDoubleDocDetection =true
Optional Change: NeedDoubleDocDetection =false

  ** Please note that the folder location is different for each scanner type and therefore, the subfolder should be chosen after opening the folder location above.

If the above does not work for Panini Scanner users, please try the following in the same Folder Location:
File Name: Panini-VisionAPI.ini
Section: [DoubleFeedDetection]
Enable=true
Enable=false
If using a Canon Scanner, clients must edit or confirm a setting within the driver configuration file. The required change is as follows:
File Location and Name: C:\ProgramData\Silver Bullet Technology\Ranger\Scanner Plug-ins\Canon-CR135iCR190i\Canon-CR135iCR190i.ini
Default Field and Value: Resolution=300
Required Change: Resolution=200

PLEASE MAKE THE CHANGE TO THE FOLLOWING SECTIONS:
[FrontBitonalImage]
[RearBitonalImage]
[FrontGrayscaleImage]
[RearGrayscaleImage]
If using a Smartsource Adaptive Scanner, clients must change a setting within the driver configuration files. The two required changes are as follows:
File Location and Name: C:\ProgramData\Silver Bullet Technology\Ranger\Scanner Plug-ins\DigitalCheck-SmartPVA\DigitalCheck-SmartPVA.ini
Default Field and value: EnableBestRead=false
Required Change: EnableBestRead=true
File Location and Name: C:\ProgramData\Silver Bullet Technology\Ranger\Scanner Plug-ins\DigitalCheck-SmartPVA\API Files\CapiReaderSmartSource.ini
Default Field and value: MAXPAGELENGTH = 0
Required Change: MAXPAGELENGTH = 2File Location and Name: C:\ProgramData\Silver Bullet Technology\Ranger\Scanner Plug-ins\DigitalCheck-SmartPVA\DigitalCheck-SmartPVA.ini
Default Field and Value: JpegTiffWrapped=true
Required Change: JpegTiffWrapped=falseIf scanning remittance items and experiencing barcode scanning failures - due to quality of scan, the following settings must be made. Digital Check (Non-Smartsource Adaptive) Scanners:
File Location and Name: C:\ProgramData\Silver Bullet Technology\Ranger\Scanner Plug-ins\DigitalCheck-TSSeries\DigitalCheck-TSSeries.ini
Default Field and Value: JpegQuality=75
Default Field and Value: JPEGImageResolution=200
Required Change: JpegQuality=100
Required Change: JPEGImageResolution=300
Smartsource Scanners:
File Location and Name: C:\ProgramData\Silver Bullet Technology\Ranger\Scanner Plug-ins\DigitalCheck-SmartPVA\DigitalCheck-SmartPVA.ini
Default Field and Value: 200DPI=3
Required Change: 200DPI=1
If using a Panini Vision X Scanner and client encounters issues viewing images in browsers using Ranger Remote, client may want to disable cropping error. The required change is as follows:
C:\ProgramData\Silver Bullet Technology\Ranger\Scanner Plug-ins\Panini-VisionAPI\Panini-VisionAPI.ini
Default Field and Value: ImageCroppingError = false
Required Change: ImageCroppingError = true
If using a Epson Capture One Scanner and client encounters issues viewing images in browsers using Ranger Remote, client must disable JPEG wrapped TIFF. The required change is as follows:
C:\ProgramData\Silver Bullet Technology\Ranger\Scanner Plug-ins\Epson-CaptureOne\Epson-CaptureOne.ini
Default Field and Value:ImageFormat=TIFF-JPEG
Required Change: ImageFormat=JPEG

**** Please note that this will exist twice in the same file. Please change both values.
Chrome Users Experiencing Memory Errors (Run Chrome with Additional Memory Allocation):
If Running Newer Versions of Google Chrome (143+)
Click Windows
Type "Run" and click enter
Place the following and click OK:
"C:\Program Files\Google\Chrome\Application\chrome.exe" --disable-features=MemorySaver,TabFreeze,AutomaticTabDiscarding"

If Running Prior Versions of Google Chrome (Below 143):
Click Windows
Type "Run" and click enter
Place the following and click OK:
"C:\Program Files\Google\Chrome\Application\chrome.exe" --js-flags="--max_old_space_size=8000 --max_semi_space_size=8000"

OR IF ON 32 BIT:

"C:\Program Files (x86)\Google\Chrome\Application\chrome.exe" --js-flags="--max_old_space_size=8000 --max_semi_space_size=8000"
Next Steps
As developers who may be reviewing this section of the guide, it is important to understand how to utilize the Payology Check Scanning SDK. The steps taken within this next section define the functions and response from the SDK. For next steps, please see CS SDK Configuration.
Updated 25 days ago