Configuring Docusplit Object Components
Configuring the Docusplit Button and Lightning Component on Object Layouts
Object Side Docusplit Components
Docusplit can be accessed thru a variety of paths:
- Through the Docusplit navigation item.
- Through a Lightning Button.
- Through a miniaturized version of Docuplit on the record.
By default, the Docusplit navigation item will display and therefore requires no additional configuration. However, the object record button and miniaturized version of Docusplit does.
Configuring the Docusplit Button on an Object
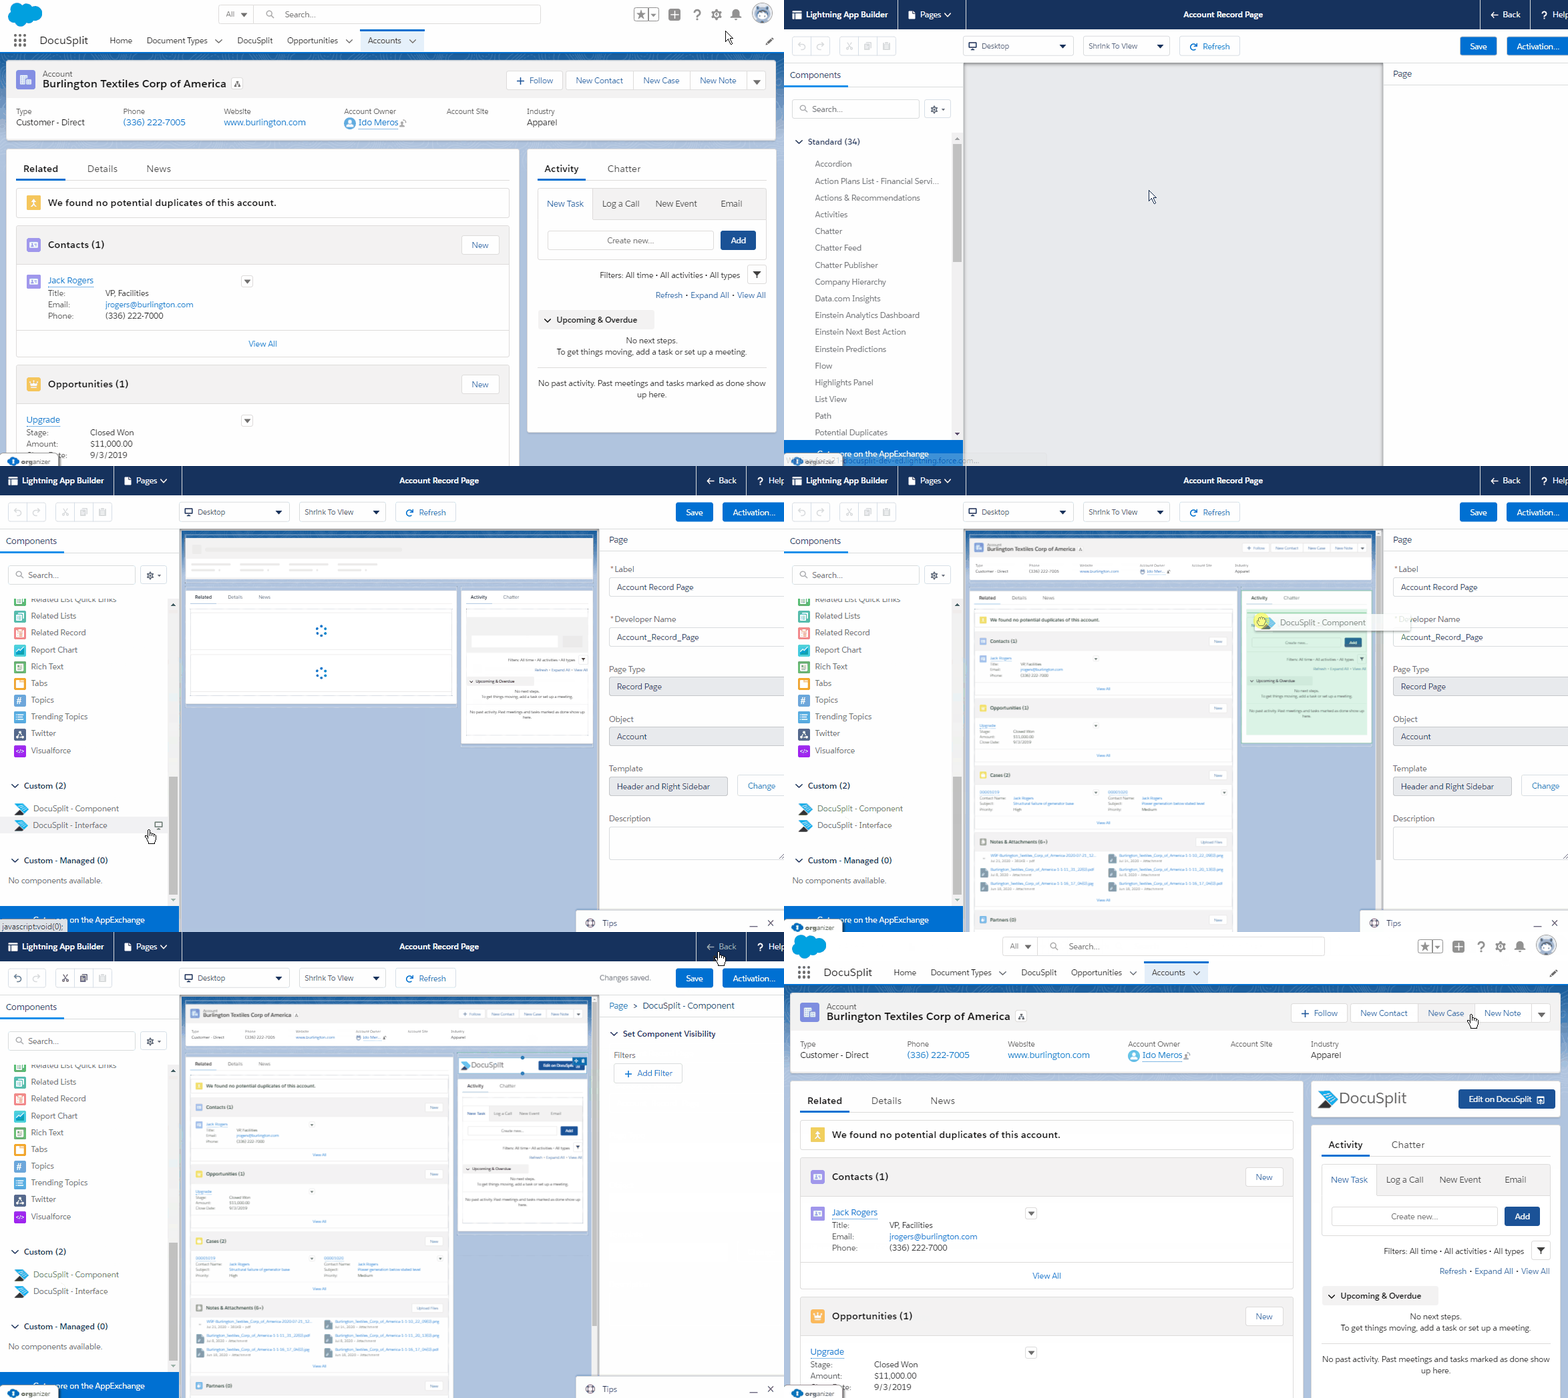
To configure the Docusplit button on an object, please follow the below instructions.
- Navigate to the Object where you want the Docusplit button to be located.
- Click on the Setup icon.
- Click "Edit Page".
- On the Components menu, select "Docusplit - Component" and drag it to your desired location on the page.
- Click "Save"
- Click "Back"

Important Notes - Docusplit Button
When using the Docusplit button on the record, the saving process becomes further streamlined. In this case, within the saving workflow, when clicking on a Document Type that can write to the object in which the button was clicked thru, the record of that object will automatically populate as the record in which the user will save to. For example, if the user clicks on the Docusplit button from an Account named "ABC Company" when saving an invoice (which writes to an Account), "ABC Company" will automatically populate as the record to save the invoice to.
Configuring the Miniaturized version of Docusplit on an Object
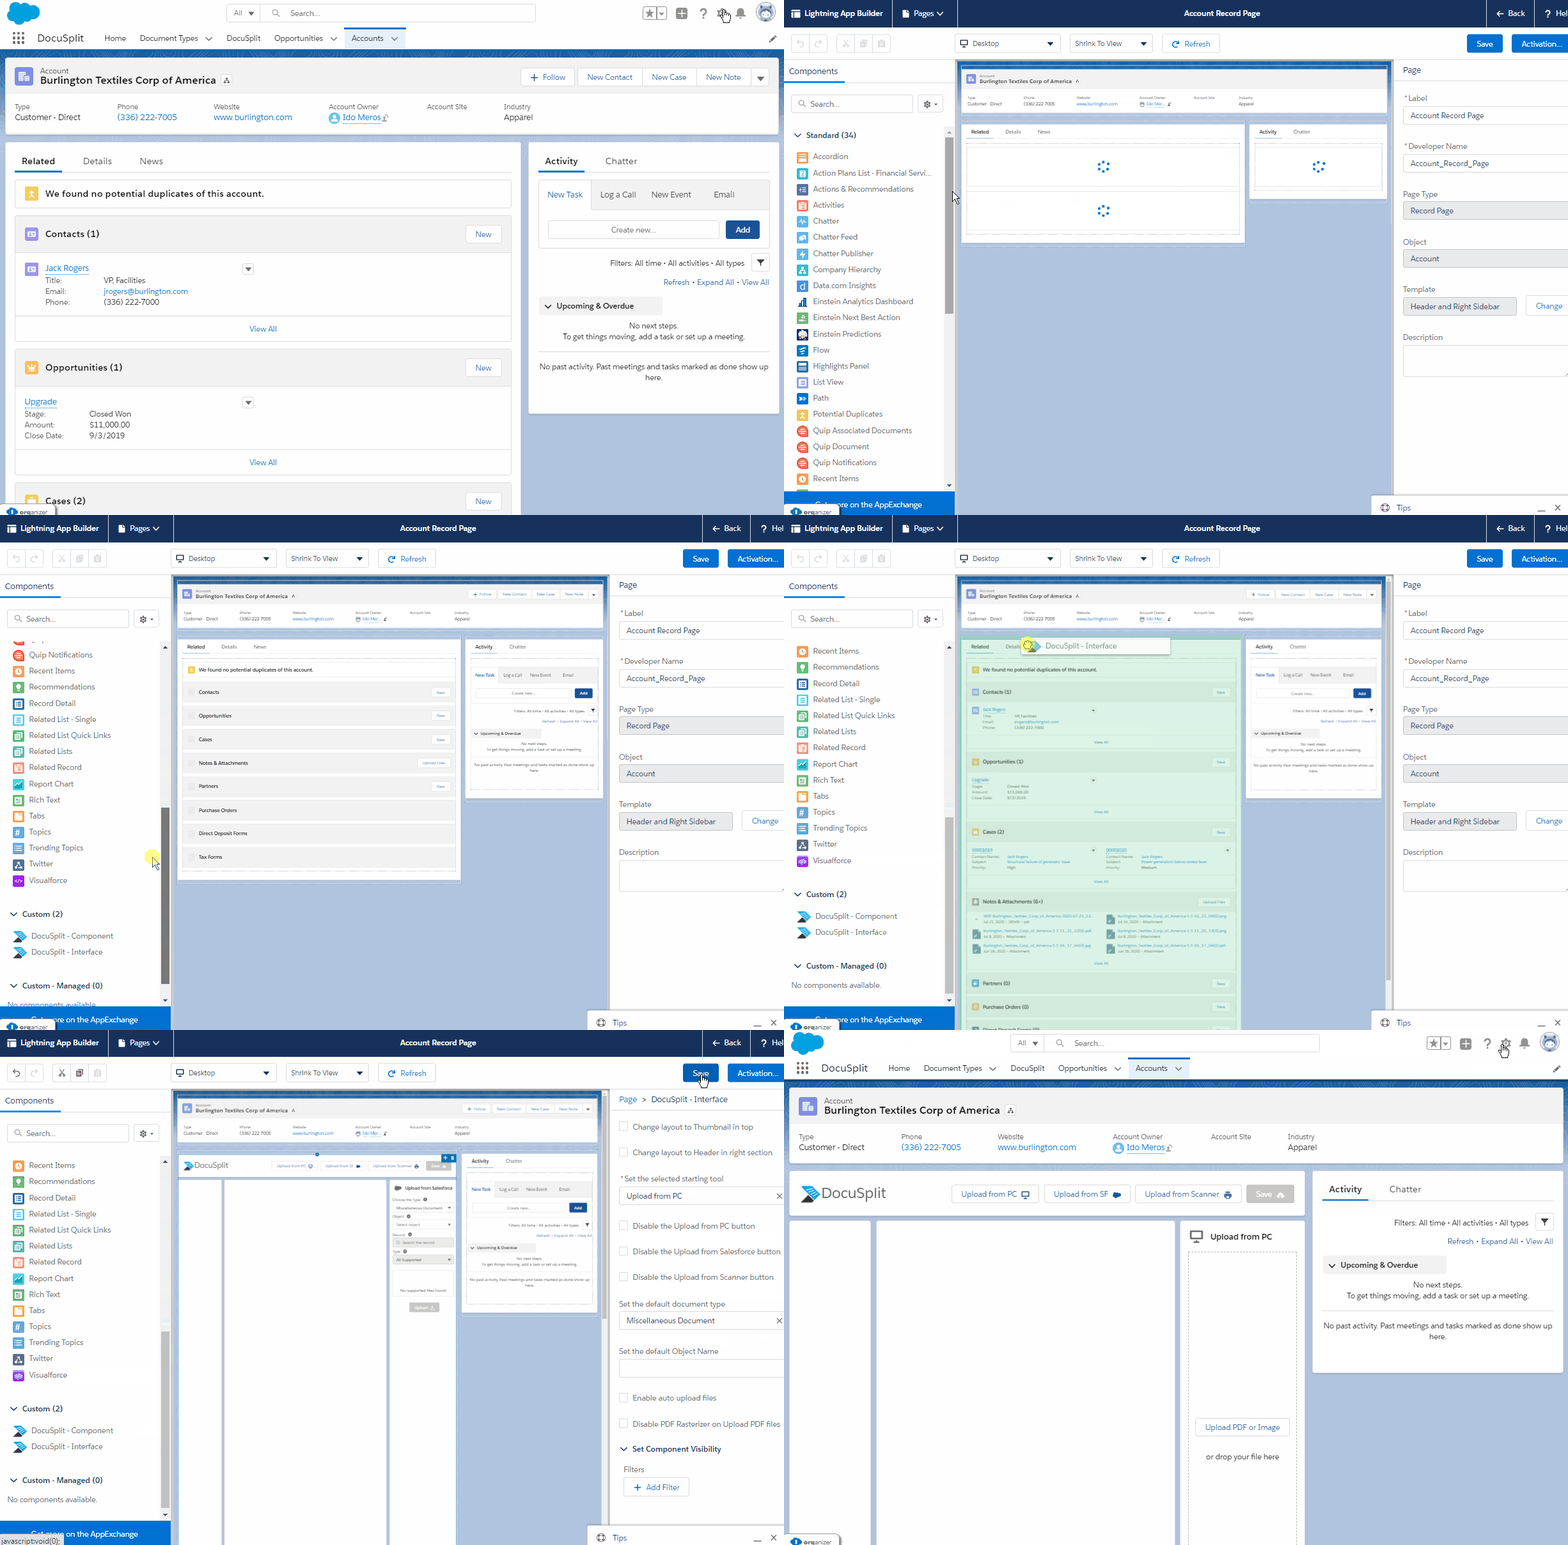
To configure the Docusplit component on an object, please follow the below instructions.
- Navigate to the Object where you desire the Docusplit button to be located.
- Click on the Setup icon.
- Click "Edit Page".
- On the Components menu, select "Docusplit - Interfact" and drag it to your desired location on the page.
- If necessary configure the settings of the component (on right side). See section "Miniaturized Version Interface Options" for more details.
- Click "Save"
- Click "Back"

Miniaturized Version Interface Options
The miniaturized version of Docusplit has several important configuration options which can further streamline import and saving processes. Each option is defined in the below grid.
Configuration Options | Description |
|---|---|
Change layout to Thumbnail in top. | By default, scanned or imported pages appear on the left-hand thumbnail section. Because an object's layout may be constrained in width, Docusplit allows a Salesforce Administrator to move the thumbnails from the left side to the top of the Docusplit component. |
Change layout to Header in right section. | The main Docusplit functions, "Upload from PC", "Upload from SF", "Upload from Scanner" and "Save" appear, by default, prominently on the top of the Docusplit User Interface. However, because of constraints, Salesforce Administrators may elect to move those functions to the top right corner, condensing the button to simple icons, thus allowing more space for other object components/fields. |
Set the Selected Starting Tool. | The Salesforce Administrator can designate which of the following functions will be used by default when opening the interface in the object record: "Upload from PC" |
Disable the Upload from PC button. | Disables the function which allows the user to upload/import a file from his/her PC. |
Disable the Upload from Salesforce button. | Disables the function which allows the user to import a file from a Salesforce record. |
Disable the Upload from Scanner button. | Disables the function which allows the user to scan documents. |
Set the default document type. | Determines which Document Type created by the Salesforce Administrator will be used by default during the saving process. |
Set the default Object Name | If a Document Type has multiple related objects, this field can be used to set the default object which will be used to save. |
Enable auto upload files | Automatically imports the files attached to the record (Upload from Salesforce) upon browsing the record. This is typically used if the record is part of a queue that must be reviewed and channeled to different Salesforce records. |
Disable PDF Rasterizer on Upload PDF files | By default PDF files upon import are rasterized to ensure there are no font/content issues. This allows a Salesforce Administrator to disable the function to speed the import process. **If encountering font errors, please reenable. |
Next Steps
The configuration process of Docusplit is now complete. To view instructions on how users can now utilize Docusplit, please see the navigation item labeled, Using the Docusplit App.
Updated 11 months ago